How to show snackbar in place of toast message , below is the code for showing snackbar in kotlin. Below code is put in Utils.kt (common file) or you can write this code in current activity also , but when we need this function multiple time so we use common function and write this code in Utils.kt .
Friday, 7 March 2025
Friday, 29 March 2024
Find Hours Diffrence in Kotlin
In Kotlin, determining the difference in hours between two timestamps is a common task, especially in scenarios involving time-based calculations. By leveraging Kotlin's interoperability with Java's date and time API, achieving this functionality becomes straightforward.
Below is a concise function to compute the hour difference between two timestamps:
Find Day Diffrence in Kotlin
In Kotlin, calculating the difference between two dates in terms of days can be achieved through various approaches. One common method is utilizing the java.time.LocalDate class is available in Java, which Kotlin can seamlessly integrate with.
Here's a simple function to calculate the day difference between two dates:
Saturday, 16 September 2023
Speech to text code in Android Kotlin
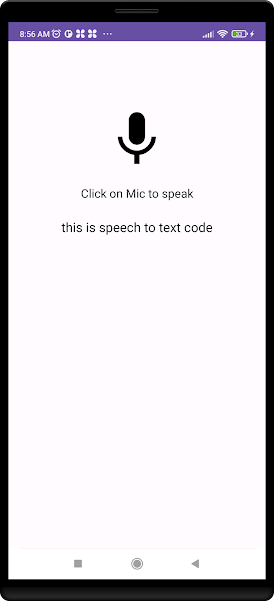
Here is the code for getting text from speech on the mic.
Here is your activity_main.xml
Tuesday, 27 June 2023
How to switch between hide and view password with icon


How to show and hide password in login screen or registration screen in android.
So , Here we see how it works with coding.
Below is your layout file.
Monday, 26 June 2023
Loading Image and Text with Jetpack Compose
How to display image in circle shape in android with jetpack compose ,
Here is some code for display circle shape image in android using jetpack compose.

Jetpack Compose display Image view and Text view in android
Now we see how to display Image view and Text View in android using Jetpack Compose.
So , Lets start with code.
First you have to add some dependency library in your build.gradle (app module)
Saturday, 24 June 2023
Jetpack Compose Add text in android application.
Adding text in android is we were using TextView in android studio.
But using jetpack compose we don't need TextView as a deign layout.
Yes , using Jetpack Compose we can add text only with coding so lets start how its work ,
First you have to add some dependency library in your build.gradle (app module)
Thursday, 22 June 2023
How to find second largest number in array without sorting in React-Native
Here is java script practical example for find second largest biggest Number from the array:
let m1 = [90, 45, 34, 67, 999, 76, 34, 89, 99, 23];
let No1 = 0;
let No2 = 0;
let mcounter = m1.length - 2;
for (let m = 0; m < m1.length; m++) {
let sR = m1[m];
if (mcounter == m) {
break;
}
if (sR > No1) {
No2 = No1; // Store the current No1 as No2
No1 = sR; // Update No1 with the new bigger value
} else if (sR > No2 && sR < No1) {
No2 = sR; // Update No2 with the new second biggest value
}
}
console.log("Second biggest number: " + No2);
Out put will be:
Second biggest number: 99
What is Jetpack Compose in Android
Jetpack compose is the new and latest toolkit for android.
Jetpack compose is the fastest and better component to build android application with out making layout designs.
Yes absolutely right , using Jetpack compose the UI for application is handling with code , using @Composable .
You can build better application with this Jetpack Compose.
How to check Internet connectivity in React-Native code
In this blog we will see Internet connectivity is on or off in react-native code.
So below is the code to check is internet connected or not ?
Tuesday, 19 July 2022
Advantages of React Native
There are several advantages of React Native
==>Java Script :- To build react native application java script knowledge is require.
==>Cross-Platform Usage :- React native app is perform in Android and iOS both platforms.
==>Instant Reflect :- When we make some changes in code it is reflect instantly in app.
==>Performance :- The code written in react native which compiled into native code , which enable for android and iOS both operating system , and it performs same in both platforms.
Thursday, 30 June 2022
What is React Native ?
React Native is open source mobile application framework.
React Native is created by Facebook.
It is used to create application for Android , iOS and Web.
React Native application coding is requires java script fundamentals.
Tuesday, 7 December 2021
How to load url in web view in android
When we want to display any url content in our android application we need to display it in Web view .
So lets see how to load url in android application using Web view.
Here is your .xml file
<?xml version="1.0" encoding="utf-8"?>
<LinearLayout xmlns:android="http://schemas.android.com/apk/res/android"
    android:layout_width="match_parent"
    android:layout_height="match_parent"
    android:orientation="horizontal">


    <ProgressBar
        android:id="@+id/progress"
        style="@style/Widget.AppCompat.ProgressBar.Horizontal"
        android:layout_width="match_parent"
        android:layout_height="20dp"
        android:layout_marginBottom="-8dp"
        android:layout_marginTop="-8dp"/>

    <WebView
        android:id="@+id/webview"
        android:layout_width="match_parent"
        android:layout_height="match_parent"/>
</LinearLayout>
And after that we have to do code for web view in .java file.
package com.myexample;

import android.os.Bundle;
import android.os.PersistableBundle;
import android.view.View;
import android.webkit.WebChromeClient;
import android.webkit.WebView;
import android.webkit.WebViewClient;
import android.widget.ProgressBar;

import androidx.annotation.Nullable;
import androidx.appcompat.app.AppCompatActivity;

public class MyActivity extends AppCompatActivity {

    WebView webView;
    ProgressBar progressBar;

    @Override
    public void onCreate(Bundle savedInstanceState) {
        super.onCreate(savedInstanceState);
        setContentView(R.layout.webivew_layout);

        webView = (WebView) findViewById(R.id.webview);
        progressBar = (ProgressBar) findViewById(R.id.progress);

        webView.setWebChromeClient( new MyWebChromeClient());
        webView.setWebViewClient( new webClient());
        webView.getSettings().setLoadWithOverviewMode(true);
        webView.getSettings().setSupportZoom(true);
        webView.getSettings().setJavaScriptEnabled(true);
        webView.loadUrl("Http://google.com");

    }


    public class MyWebChromeClient extends WebChromeClient {
        public void onProgressChanged(WebView view, int newProgress) {
            progressBar.setVisibility(View.VISIBLE);
            progressBar.setProgress(newProgress);
        }
    }

    public class webClient extends WebViewClient {
        public boolean  shouldOverrideUrlLoading(WebView view, String url) {
            view.loadUrl(url);
            return true;
        }

        @Override
        public void onPageFinished(WebView view, String url) {
            super.onPageFinished(view, url);
            progressBar.setVisibility(View.GONE);
        }
    }

    @Override
    public void onBackPressed() {
        if (webView.canGoBack()) {
            webView.goBack();
            progressBar.setVisibility(View.GONE);
        } else  {
            super.onBackPressed();
        }
    }
}
This is how we can call any url in our android application using web view.
Tuesday, 28 September 2021
Splash Screen
Here we are making splash screen which is used in all application as a first screen.
So lets start to learn how to make the splash screen.
First make .xml layout for it , most of splash screen are with image.
So here is your splash_screen.xml
Wednesday, 21 April 2021
How to Display Current Location on Google Map with Kotlin Android
How to display my current location on google map in android with using Kotlin Android

So Lets start how to display current location on google map with Kotlin Android with Google Map API services.
Step 1 : You need to Google Developer Console and sign in
Step 2 : Create your new project by clicking on CREATE PROJECT and give name of project.
Step 3 : Now click on API's and Services and open Dashboard.
Step 4 : Now Click on Enable API and Services.
Step 5 : Now Enable the Google Map Android API.
Step 6 : Now click on Credentials.
Step 7 : Click on Create Credentials and choose API key
Step 8 : Now there is your API key for Google Map , copy it and paste it on you android code , location is in your app/res/values/ here google_maps_api.xml file is there.
Now create Android Studio project with google Map.
Saturday, 3 April 2021
How to make EditText Mask format in Android
How to make like below image in android.

This is the called as Edittext mask making , it means that how to make edittext inserting data format like card view , like expiry date format etc...
So here we learn how to make Edittext Mask Making Format in android.
Wednesday, 31 March 2021
Android Text Shader with Gradient Style
How to set textview gradient color in android , below image is showing the text with gradient style , this style is apply with 2 colors and Text Shader method.

So , lets start to learn how to do the textview gradient color.
txtshader1.getPaint().setShader(SetTextShader_Gradient1(mContext));
Shader textShader=new LinearGradient(0, 0, 0, 60,
new int[]{mContext.getColor(R.color.text_gradiet_1),mContext.getColor(R.color.text_gradiet_2)},
new float[]{0, 1}, Shader.TileMode.CLAMP);
This is the how Textview work with colors using Text Shader.
Here is the code for this doing Textview with gradient style.
Android Stripe Payment Integration
How to make Payment with Stripe , Here we are doing the Stripe Payment process integration.
Card card = new Card("4242424242424242", 12, 2022, "123");
// Card card = new Card(cardNumber, cardExpMonth, cardExpYear, cardCVC);
boolean validation = card.validateCard();
if (validation) {
Stripe stripe = new Stripe(mContext);
// Stripe stripe = new Stripe(Pay_With_Bank.this);
stripe.createToken(
card,
userPublishableKey,
new TokenCallback() {
public void onSuccess(Token token) {
if (checkInternetConnection()) {
Log.d("tokendataid", token.toString());
dialog = new ProgressDialog(mContext);
dialog.setMessage("Please Wait...");
dialog.show();
new Thread(new Runnable() {
@Override
public void run() {
runOnUiThread(new Runnable() {
@Override
public void run() {
sendCardToInfoToStripe(token.getId());
}
});
}
}).start();
} else {
dialog.dismiss();
Toast.makeText(mContext, "enable Internet", Toast.LENGTH_LONG).show();
}
}
public void onError(Exception error) {
dialog.dismiss();
Toast.makeText(mContext, error.getMessage(), Toast.LENGTH_LONG).show();
// myUtility.setAlertMessage("Error", error.getMessage());
}
});
return true;
} else if (!card.validateNumber()) {
dialog.dismiss();
Toast.makeText(mContext, "The card number that you entered is invalid.", Toast.LENGTH_SHORT).show();
} else if (!card.validateExpiryDate()) {
dialog.dismiss();
Toast.makeText(mContext, "The expiration date that you entered is invalid.", Toast.LENGTH_SHORT).show();
} else if (!card.validateCVC()) {
dialog.dismiss();
Toast.makeText(mContext, "The CVC code that you entered is invalid.", Toast.LENGTH_SHORT).show();
} else {
dialog.dismiss();
Toast.makeText(mContext, "The card details that you entered are invalid.", Toast.LENGTH_SHORT).show();
}
Here , we are giving static card details .
private boolean checkInternetConnection() {
ConnectivityManager conMgr = (ConnectivityManager) mContext.getApplicationContext()
.getSystemService(Context.CONNECTIVITY_SERVICE);
if (conMgr.getActiveNetworkInfo() != null
&& conMgr.getActiveNetworkInfo().isAvailable()
&& conMgr.getActiveNetworkInfo().isConnected()) {
return true;
} else {
return false;
}
}
private void sendCardToInfoToStripe(String token) {
StrictMode.ThreadPolicy policy = new StrictMode.ThreadPolicy.Builder()
.detectAll()
.penaltyLog()
.build();
StrictMode.setThreadPolicy(policy);
try {
com.stripe.Stripe.apiKey = "";
Map<String, Object> params = new HashMap<>();
int pricedata = Integer.parseInt(price) * 100;
price = String.valueOf(pricedata);
params.put("amount", price);
params.put("currency", "usd");
params.put("description", "Discription");
params.put("source", token);
Log.d("asdf", params.toString());
Charge charge = Charge.create(params);
Log.d("token_id", charge.getStatus());
Log.d("payment_id", charge.getId());
Toast.makeText(mContext, charge.getStatus(), Toast.LENGTH_SHORT).show();
bank_payment_type = "bank";
bankpayment_status = charge.getStatus();
if (bankpayment_status.equalsIgnoreCase("succeeded")) {
bankpayment_status = "completed";
Toast.makeText(mContext, "Payment is complted", Toast.LENGTH_SHORT).show();
} else {
bankpayment_status = "cancelled";
}
bank_payment_id = charge.getId();
try {
dialog.dismiss();
} catch (Exception e) {
e.printStackTrace();
}
if (appoint.equalsIgnoreCase("appointment")) {
var = "1";
} else {
}
Log.d("log..", "status" + charge.getStatus());
} catch (Exception e) {
dialog.dismiss();
Toast.makeText(mContext, "error occur"+e.getMessage(), Toast.LENGTH_SHORT).show();
e.printStackTrace();
}
}
This is the code how to use Stripe Payment in Android.
Tuesday, 30 March 2021
Android API calling with Retrofit method
How to call API using Retrofit method , here we are looking how to parse web API using Retrofit and with Header.
APIInterface apiInterface = RetrofitService.createService(ApiInterface.class, "BASE_URL", false);
the "false" is your Header boolean , if your web api having Header like "Bearer" token so the boolean is "true".
//Retrofit service method for all api callingpublic static <S> S createService(Class<S> serviceClass, String serverURL, boolean withHeader) { Gson gson = new GsonBuilder().setLenient().create(); HttpLoggingInterceptor logging = new HttpLoggingInterceptor();logging.setLevel(HttpLoggingInterceptor.Level.BODY); httpClient = new OkHttpClient.Builder();httpClient.addInterceptor(logging); httpClient.connectTimeout(60, TimeUnit.SECONDS );httpClient.readTimeout(60, TimeUnit.SECONDS ); // httpClient.addNetworkInterceptor(new AddHeaderInterceptor());if (withHeader) { httpClient.addInterceptor(new Interceptor() { @Overridepublic Response intercept(Chain chain) throws IOException { final Request request = chain.request().newBuilder() //.addHeader("Accept", "application/json")//.addHeader("Authorization","Bearer "+ Activity_Login.token)//A1 update.addHeader("X-Requested-With", "XMLHttpRequest") .addHeader("Authorization", "Bearer "+"your token").build(); //SharedHelper.getKey(mContext, Str_RemeberLoginKey)
return chain.proceed(request); }});}
builder = new Retrofit.Builder().baseUrl(serverURL).addConverterFactory(GsonConverterFactory.create(gson)).addConverterFactory(ScalarsConverterFactory.create());Retrofit retrofit = builder.client(httpClient.build()).build(); return retrofit.create(serviceClass);}
Now , above is the method for api parsing .Make your pojo class using api response and put it in your code and i here give you a code for api parsing using Retrofit method.
private void callRegister() {
 APIInterface  reg_api = RetrofitService.createService(ApiInterface.class, "BASE_URL", true);

    //str_fname,str_lname,str_phone
    RegisterBody regmodel = new RegisterBody();

    regmodel.setFirst_name(str_fname);
    regmodel.setLast_name(str_lname);
    regmodel.setCountry_code("+91");
    regmodel.setMobile(str_phone);
    regmodel.setPassword(str_password);

    Call<RegisterModel> callAdvisoryApi = reg_api.getRegister(regmodel);

    callAdvisoryApi.enqueue(new Callback<RegisterModel>() {
        @Override
        public void onResponse(Call<RegisterModel> call, Response<RegisterModel> response) {


            RegisterModel objRegisterModel = response.body();

            if (response.code() == 200) {


                Toast.makeText(mContext,"Register Successfully..",Toast.LENGTH_LONG).show();

                Intent myintent = new Intent(mContext, MainActivity.class);
                startActivity(myintent);

            } else {

                Utilities.displayMessage(mContext, "Could not signup..Please try again");
            }
        }

        @Override
        public void onFailure(Call<RegisterModel> call, Throwable t) {
            Toast.makeText(mContext, "Failed to load data" + t.getMessage(), Toast.LENGTH_SHORT).show();
        }
    });
}
public interface ApiInterface {

    @POST("/api/user/signup")
    Call<RegisterModel> getRegister(@Body RegisterBody regmodelobj);

    @POST("/api/user/login")
    Call<LoginModel> postLogin(@Body LoginParameters params);
}
Below is the link for code of Retrofit api calling.
private void callRegister() {
APIInterface reg_api = RetrofitService.createService(ApiInterface.class, "BASE_URL", true);
//str_fname,str_lname,str_phone
RegisterBody regmodel = new RegisterBody();
regmodel.setFirst_name(str_fname);
regmodel.setLast_name(str_lname);
regmodel.setCountry_code("+91");
regmodel.setMobile(str_phone);
regmodel.setPassword(str_password);
Call<RegisterModel> callAdvisoryApi = reg_api.getRegister(regmodel);
callAdvisoryApi.enqueue(new Callback<RegisterModel>() {
@Override
public void onResponse(Call<RegisterModel> call, Response<RegisterModel> response) {
RegisterModel objRegisterModel = response.body();
if (response.code() == 200) {
Toast.makeText(mContext,"Register Successfully..",Toast.LENGTH_LONG).show();
Intent myintent = new Intent(mContext, MainActivity.class);
startActivity(myintent);
} else {
Utilities.displayMessage(mContext, "Could not signup..Please try again");
}
}
@Override
public void onFailure(Call<RegisterModel> call, Throwable t) {
Toast.makeText(mContext, "Failed to load data" + t.getMessage(), Toast.LENGTH_SHORT).show();
}
});
}
public interface ApiInterface {
@POST("/api/user/signup")
Call<RegisterModel> getRegister(@Body RegisterBody regmodelobj);
@POST("/api/user/login")
Call<LoginModel> postLogin(@Body LoginParameters params);
}
Subscribe to:
Posts (Atom)